Thursday, April 29, 2010

Chilli Grilled Kingfish

Kingfish, or Yellowtail Kingfish, is found off the south east coast of Australia.  It may be served cooked or raw if proper care is taken, but the most popular preparation method is probably on the barbeque.  Because the flesh tends to dry out a bit, be careful not to overcook it.  I made sure to use citrus and garlic in my marinade to help retain as much moisture as possible while it cooked.  This is a very simple recipe but the results are fantastic. 

Chilli Grilled Kingfish


Ingredients

4 kingfish fillets
3 chillis, minced
3 cloves garlic, minced
1 lemon, zested and juiced
1 small bunch flat leaf parsley, minced
1/4 cup oregano, minced
salt and pepper
olive oil

Directions

1. For marinade, add chillis, garlic, zest, herbs, and seasoning to a mortar and mash with pestle.  Add just enough olive oil to make a liquidy paste.


2. Marinate the fillets in the refrigerator for 1 hour.

3. Prepare grill for cooking over medium high heat.  Grill fish for 3 minutes on each side or until almost cooked through.  Serve immediately.

Tuesday, April 27, 2010

Roasted Zucchini & Eggplant Lasagna

Obviously fresh pasta is best, but when you're looking to throw a dinner together quickly, oven-ready lasagna noodles can be a godsend.  There is no pre-cooking required AT ALL!  They will absorb the tomato sauce as the lasagna bakes and soften. 

As an added bonus, you can also prepare this ahead of time and store in the fridge until you are ready to bake.  Feel free to use your favorite sauces and and fillings - cheese?  meat?  vegetables?  Just make sure to start with sauce, top with lasagna, alternate layers of filling and lasagna, finish off with a layer of sauce, then top with cheese.

Roasted Zucchini & Eggplant Lasagna


Ingredients

1 eggplant, cut crosswise into 1/4" rounds
2 zucchini, cut crosswise into 1/4" rounds
3 tbsp olive oil
1/2 carrot, diced
1 onion, diced
3 garlic cloves, chopped
1 24oz bottle of tomato passata
pinch of dried chilli flakes
1 1b ricotta
1 egg
3/4 cup parmesan, grated
2 tsp parsley, chopped
2 tsp basil, chopped
1 package pre-cooked lasagna noodles
1/2 cup  mozzarella, grated
salt and pepper

Directions

1. Preheat oven to 375 degrees F.  Season eggplant and zucchini and toss with 1 1/2 tbsp olive oil.  Transfer eggplant to baking sheet and roast for 10 minutes, add zucchini and roast for 20 more minutes, stirring occasionally.  Set aside.

2. Meanwhile, heat remaining olive oil over medium heat and saute carrot, onion, and garlic until tender.  Add passata and and chilli flakes.  Season and simmer for 15 minutes. 

3. In a large bowl, mix ricotta, egg, 1/2 cup parmesan, and herbs. Season with salt and pepper.

4. In glass baking dish, spread thin layer of tomato sauce.  Arrange lasagna noodles over sauce.  Spread half of ricotta mixture and arrange half of vegetables over ricotta.  Spread with layer of tomato sauce.  Repeat layering and top with lasagna noodles.  Spread with tomato sauce and sprinkle with mozzarella and remaining parmesan. 

5. Bake covered for 40 minutes.  Uncover and bake an additional 15 minutes until cheese begins to brown.  Let stand for 5 minutes before slicing and serving.

Sunday, April 25, 2010

Happy Birthday!!!

Around this house, there is one kind of cake that is always requested come birthday time, a plain vanilla cake...  I had yet to deliver until now.  I always want to experiment with a new technique, ingredient or a recipe that is a bit more exciting.  And he wants plain old boring vanilla cake?  Against my own desires, I decided to surprise him with this ongoing request.  It pains me to say it, but it was definitely the right decision.  There will always be an appeal to this simple dessert.  It was perfectly moist but firm and relatively easy to frost.   

The recipe is very easy and I used a Rachel Ray recipe for vanilla frosting, but feel free to use your favorite (suggestions are welcome!).  Since I can never get the icing perfectly smooth and beautiful, I went for a swirly messy look and I think it turned out great!

Simple Vanilla Cake


Ingredients

4 eggs, room temperature
2 cups sugar
2-1/2 cups all-purpose flour
1 cup milk
3/4 cup vegetable oil
2 tsp baking powder
1 1/2 tsp vanilla

Directions

1. Preheat oven to 350 degrees F (180 C).  Thorougly grease 2 round cake pans. 

2. Beat sugar and eggs in a large mixing bowl for 1 minute until thickened.   Beat in flour, milk, oil, baking powder, and vanilla until thoroughy combined and creamy, but do not overbeat as this will cause a very 'heavy' cake.

3. Pour batter into greased cake pans and bake for about 30 minutes or until golden and cooked through.  Use the toothpick test, if it does not come out clean, put it back into the oven and check every 5 minutes. 

4. Cool for 5 minutes then turn out onto a wire rack to cool completely.  Frost  the top of the first layer, top with the second layer, and frost completely. 

Happy Birthday!

Thursday, April 22, 2010

A Not-so Traditional Osso Bucco

I had a recent request for Osso Bucco, I've never made this before and I'm not totally sure that I've even eaten it, so I had to do a bit of research.  In a nutshell, this is an Italian recipe for braised veal shanks.  I love making braised dishes, they are surprisingly easy and almost all of the work is done hours before serving allowing you to enjoy yourself and throw together any side dishes, and maybe a glass of wine, while your main is cooking away.

From what I read, Osso Buco originated in Milan. The name means “bone with a hole” which is a reference to the veal shank bone and marrow filling which undoubtedly contributes to the flavor of this dish.  The veal shanks are braised with vegetables, white wine, and stock.  Gremolata, a mixture of Italian parsley, zested lemon peel, and garlic is added to the sauce at the end of cooking or used as a garnish.  It is traditionally served over saffron risotto.

I decided to branch out a bit from your typical Osso Bucco, maybe it's just personal preference, but I thought my version was fantastic and so did two hungry mouths at the table.  Originally this dish was not made with tomatoes, but they were a must for me.  I assume the only reason they were not added is that they were undiscovered in Milan at the time.  Instead of white wine, I used a combination of balsamic vinegar, dry sherry, and a splash of brandy to add a bit of tanginess.  I also decided to be easy on myself, skip the risotto, and serve it over mashed potatoes.  I like this rendition as the potatoes soaked up all of that delicious gravy!

I feel like I got the most out of this dish by really concentrating on the layers of flavor.  In any braised dish, rich and savory is easy to achieve, but I loved the added tanginess from the brandy, the hint of balsamic vinegar that gets very syrupy and sweet when it reduces, and the zesty hit of the gremalata when used as a garnish.

Osso Bucco


Ingredients

4 pieces veal shank, bone-in, cut 2 inches thick
all-purpose flour, for dredging
4 tbsp olive oil
2 carrots, diced
1 red onion, diced
1 stalk celery, diced
1/2 green pepper, diced
1/2 red pepper diced
5 cloves garlic, thinly sliced
1/2 cup dry sherry
1/4 cup brandy
1 1/2 tbsp balsamic vinegar
1 can diced tomatoes
2 tbsp tomato paste
1 sprig rosemary
2 sprigs thyme
1 bay leaf
2 1/2 cups chicken broth
salt and pepper

For gremolata:
2 tbsp parsley, minced
1 tbsp lemon zest
1 garlic clove, minced

Directions

1. Preheat oven to 325 degrees F (160 C).  Ensure shanks are completely dry and secure the meat to the bone if desired using cooking string. Season each shank with salt and freshly ground pepper. Dredge the shanks in flour and shake off excess

2. In a Dutch oven with a tight fitting lid, heat 2 tbsp olive oil over medium high heat. Brown shanks all sides, about 3 minutes per side. Remove and set aside to be added later.

3. Reduce heat to medium, add remaining olive oil.  Add the carrot onions, celery, peppers, and garlic.  Season and cook until soft, about 8 minutes.

4. Increase heat a bit and add sherry, brandy, and vinegar to deglaze.  Make sure to scrape up any brown bits using a wooden spoon.  Reduce heat to medium and simmer until reduced by almost half.

5. Tie herbs together and add to pot with diced tomatoes and tomato paste.  Mix well and return shanks to pot.  Add broth slowly so that it reaches about 3/4 the height of the shanks.  Add more or less as required. 

6.  Bring to a boil then place in the oven.  Cook for about 1 1/2 hours until tender and pretty much falling off the bone.

7. Meanwhile, combine all ingredients for gremolata.

8. Take pot out of the oven, remove the shanks and cover to keep warm.  Heat pot over medium heat to reduce sauce to desired consistency.

9. Serve over mashed potatoes, drizzle with sauce, and garnish with gremolata.  Serve immediately.

A Traditional Gazpacho

I recently posted a recipe for Spiced Pumpkin Soup, a perfect remedy for the early autumn weather.  Being that it's spring in North America and they've already had some ridiculously hot days in Virginia, my favorite pregnant sister requested something a bit more appropriate for the temperature, a cool and refreshing gazpacho.  When a pregnant woman has a request regarding food, you must oblige right?

It actually worked out for me as well.  We have reverted back to summer this past week in Melbourne so a gazpacho was just what I needed.  In addition, any food that can bring me back to the days of living in southern Spain, I will gladly take on!

I kept the recipe pretty traditional.  There are a myriad of varieties, but I suggest starting out with the basic recipe then getting creative and adding different vegetables, herbs, possibly grilled shrimp, but it's going to be hard to beat the classic version!  Oh yeah, do NOT skip the olive oil-soaked croutons, they are a must to get the full effect!

Gazpacho


Ingredients

6 tomatoes
1 cucumber, peeled, seeded and roughly chopped *
1 green pepper, roughly chopped *
1 onion, roughly chopped *
2 garlic cloves
1/2 cup EVOO, plus 1 tbsp (use a good one, it's worth it!)
2 tbsp red wine vinegar
salt and pepper
3-4 slices day old french bread

*If desired, reserve just a bit to mince and use as garnish

Directions

1. To peel tomatoes, prepare a large bowl of ice water.  Cut a small cross in the bottom of each tomato and add tomatoes to boiling water for 30 seconds.  Refresh in ice water and peel immediately.  Cut the tomatoes in half crosswise to squeeze out the seeds.  Roughly chop 3 tomatoes and set aside.  Puree remaining tomatoes and transfer to a large bowl.

2. Add chopped tomatoes, cucumber, green pepper, onion and garlic to a food processor and pulse until they are finely minced.  Add to bowl.

3. Add 1/2 cup olive oil and vinegar to bowl and season with salt and pepper.  Stir to thoroughly combine.  Refrigerate atleast 2 hours.

4.  Before serving, cut bread into cubes then heat remaining tablespoon of olive oil over medium high heat.  Toss bread cubes in pan until golden. 

5. Ladle gazpacho into bowls and garnish with minced veggies and olive oil 'croutons.'  Head out to your back deck and enjoy.

Tuesday, April 20, 2010

Why buy?

As I mentioned in a previous post, lately I've been all about making my own sauces, condiments, etc.  With minimal effort, I'm happy to say I have a fridge stocked with homemade jams, barbeque sauce, sweet chilli sauce, preserved lemons, homemade vinaigrettes, and a couple of marinades.  I love knowing exactly what's in my food and that is made with wholesome, fresh ingredients. 

I threw a bit of the sweet chilli sauce from last week into a stir-fry that I made last night, so much better than using store-bought!  You can use it as an accompaniment to barbecued chicken or shrimp, use it in a stir fry sauce, or as-is as a dipping sauce for spring rolls or dumplings.  Mine came out pretty spicy for a sweet chilli sauce so next time I might deseed a few more of the chilis to remove some of the heat. Either way, it's super easy, will last for months, and tastes great.

Sweet Chilli Sauce


Ingredients

2 1/2 cups caster sugar
2 cups white wine vinegar
2 cups water
3 lemongrass stems, peeled and sliced very thin
8 garlic cloves, peeled
15 long red chillies, 10 seeded, all chopped *
1/2 tsp salt

* The more chillies that you deseed, the less heat will be in the sauce

Directions

1. In a medium saucepan, combine the sugar, vinegar, and water.  Bring to a boil
2. Meanwhile, puree lemongrass, garlic, chillies and salt in a food processor
3. Add to saucepan and simmer until reduced by half and thickened.
4. Cool and store in an airtight container in the fridge for up to 2 months. 

Sunday, April 18, 2010

Mango Rice Salad

Here's one to get all of my North American friends excited about mango season.  It's easy to get in a rut with rice and forget that there are endless possibilites to give this grain a makeover.  This rice 'salad' is very easy and will totally transform plain old white rice into a sweet, spicy, tangy, and delightful side dish.  You may serve the rice warm or at room temperature.  This would go beautifully with a sticky honey-soy pork tenderloin. 

Mango Rice Salad


Ingredients

2 cups water
2/3 cup light coconut milk
1 1/4 cups uncooked long-grain rice
3/4 cup chopped green onion
2 mangos, peeled and diced
1 red chili, finely chopped
1/2 cup cilantro, chopped
1/2 cup mint, chopped
1/4 cup Thai fried shallots (I used store bought to save some time and effort)
1/4 cup shredded coconut toasted
juice of 2 limes
salt and pepper

Directions

1. Bring water and coconut milk to a boil in a medium saucepan; add rice. Cover, reduce heat, and simmer 15 minutes or until the liquid is absorbed.

2. Allow the rice to cool for 5 minutes and add all ingredients.  Season to taste with salt and pepper.

Friday, April 16, 2010

Spiced Shrimp Tagliatelle

This quick and easy pasta dish always pleases.  I love how the addition of just a very small amount of an ingredient can change the whole feel of your dish.  With only a dash of chili, you get an entire new layer of flavor.  The small hit of buttter smooths out the whole dish and seems to bind everything together. 

Spiced Shrimp Tagliatelle


Ingredients

12 oz. tagliatelle, fresh or dried
1 lb shrimp, peeled and deveined
1 1/2 tbsp olive oil
3 gloves of garlic, finely chopped
1/2 tsp dried red pepper flakes
1 small onion, chopped
3/4 cup dry white wine
1 can diced tomatoes, drained
2 tsp butter
1/4 cup basil leaves, chiffonaded
salt and pepper

Directions

1. Cook the pasta in salted boiling water until al dente, drain. 
2. Meanwhile, heat oil over medium high heat in large pan.  Season shrimp with salt and pepper and add to pan with garlic and chili.  Saute until pink and cooked through.  Remove shrimp and set aside. 


3. Add remaining olive oil to pan.  Add onion and cook for 2 minutes.  Pour in wine to deglaze pan, make sure to stir up any brown bits.  When wine is reduced by half, add tomatoes, butter, and return shrimp pan to warm.  Stir in pasta until evenly coated.  Remove from heat and stir through basil. 


You can make this with any kind of pasta, add more vegetables if you like...  it's super easy but still very tasty!

Wednesday, April 14, 2010

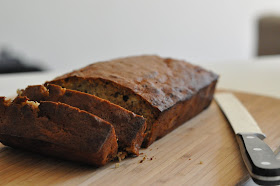
Mamma's Banana Bread

My mom makes the best banana bread, hands down.  It's always perfectly moist with just the right amount of sweetness.  It's a simple recipe, there are no secret ingredients, but it just works.  Maybe my love for this rendition has something to do with the comfort of being home but I'd be surprised if any other critic found it short of amazing. 

Remember I said it's simple?  I know it's probably breaking some cardinal rule of baking but you just add all the ingredients at once and mix.  There's no mixing of dry and wet ingredients separately, gradual incorporation, etc.  Maybe one day I'll try it out using more traditional methods but it's hard to find a reason to when the outcome is this good.  Enjoy!


Ingredients

3 or 4 ripe bananas, mashed
1 cup sugar
1/3 cup melted butter
1 large egg, beaten
1 1/2 cups of all-purpose flour
1 tsp baking soda
1 tsp vanilla extract
Pinch of salt

Directions

1. Preheat the oven to 350°F (175°C).  Butter your loaf pan.
2. (If you've forgotten already) Mix it all together using wooden spoon. 
3. Pour into buttered pan and bake for 1 hour. Cool completely on wire rack.  Voila, so easy!

Monday, April 12, 2010

Barra on the Barbie

Barramundi, also known as Asian seabass (along with numerous other names), is very common on the Australian table.  If you aren't familiar with Barramundi, which most of my North American friends probably are not, it is a white, flaky fish that is best cooked whole as its thick skin both protects the fish and retains moisture while cooking.

Interestingly enough, I recently read that Dr. Oz, Oprah's go-to medical advisor, just named Barramundi one of his ‘5 Super Foods To Eat Now’ for its anti-aging, immune boosting and cancer fighting properties.
“If the Barramundi fish were a human, he would be a tree-hugging, salad-loving vegetarian. The Barramundi, hailing from the coast of Australia , eschews his fellow fish, dining on plankton instead. That means he doesn’t load up on mercury-packed smaller fish and has extremely low levels of the toxin, which is especially important for pregnant women.
"Free of mercury, but full of heart- and brain-healthy omega-3s, the Barramundi, which is becoming more popular in the US, is a shoe-in for one of the top 5 superfoods. Bonus: the white meat is light, flaky and delicious.”
As if I didn't already love it, it's just another excuse to keep this light and delicious fish as a staple in my diet.  And if it comes from one of Oprah's advisors, it's gospel right?

Here's a quick and easy recipe.  I'm not indicating quantities as you can simply modify for how many people you are feeding and how much you can stuff into the fish cavity.  By the way, my new grill basket has made life infinitely easier.  I highly recommended you purchase one of these for grilling whole fish, so much easier than battling to ensure the skin doesnt stick to your grill.

Barra on the Barbie


Ingredients

fresh whole barramundi
olive oil
garlic cloves, smashed
lemon
herbs
salt and pepper

Directions

1. Rinse and pat fish completely dry.  Cut diagonal incisions on both sides of fish 1/2 - 1 inch apart.  Season inside and outside with salt and pepper.

2. Using an olive oil spray or paper towel soaked in oil, coat inside of grill basket and outside of fish with oil to ensure it does not stick.  If you are not using a grill basket, make sure to thorougly coat grill grates. 

3. Slice lemons, reserving one to squeeze over fish once it is cooked.  Stuff fish cavities with slices lemons, garlic cloves and fresh herbs.  I used thyme sprigs, oregano, and parsley and saved my torn basil to garnish.

4. Grill fish for about 5-7 minutes on each side until cooked through.  Adjust according to size. 


5. Remove and serve whole.  Squeeze lemon juice over fish and garnish with some fresh herbs.  Dig in!


Sunday, April 11, 2010

Spiced Pumpkin Soup

The autumn weather was definitely upon us over the weekend here in Melbourne.  I love the change of seasons when you start craving those hearty, savory foods that seem to take the edge off of the chill in air.  Nothing says fall more than the vast varieties of squash and pumpkins that quickly become available as the leaves start to turn.

This soup is perfect for a chilly day, I even added a bit of chili to really get our blood flowing! 

Spiced Pumpkin Soup


Ingredients

2 lb pumpkin or winter squash, deseeded, peeled and cubed
2 tbsp olive oil
1 onion, chopped
3 garlic cloves, chopped
1/2 tsp cumin
1/2 tsp ground coriander seeds
1/4 tsp turmeric
1/4 tsp curry powder
2 bay leaves
2 chilis, finely chopped (more or less depending how spicy you want it)
2 cups chicken stock
S&P, to taste

Directions

1. Heat the oil in a large saucepan over medium heat.  Add onion and garlic and cook for 3-4 minutes or until the onion is soft. Stir in the chilis and spices and cook for 30 seconds. 
2. Add the cubed pumpkin and cook for 3 minutes, stirring continuously.
3. Add the stock and bring to a boil.  Reduce heat and simmer for 20 minutes.  If the mixture is too thick, add more stock or water. 
4. Puree soup in a food processor or blender until smooth. Return soup to pan and stir over medium heat for 2-3 minutes or until heated through. Season with salt and pepper.

Garnish with a dollop of yogurt and a couple cilantro leaves.  This soup could also be served chilled for a hot day.  I'm sure I'll be craving it all year round!

Thursday, April 8, 2010

My Go-to Salsa Recipe

This is a very simple recipe but I thought I'd post it since most people don't make their own salsa and opt for a readymade one.  It's super easy, cheap, and tastes fantastic.  I'm on a kick of wanting to make own sauces, rubs, salts, etc... especially those that will keep.  I'll have the satisfaction of knowing exactly what is going into them as well the convenience of having them on hand to throw together a quick and easy dinner on the barbie.  I have big plans this weekend to make homemade sweet chili sauce, barbeque sauce, nuoc cham, as well as an array of flavored salts.  I'll be sure to post my results, but in the meantime... enjoy this fresh and simple recipe.

Salsa Fresca


Ingredients

6 ripe tomatoes,
1/2 red onion, chopped
2 jalapenos, minced
small handful cilantro sprigs, chopped
1 garlic clove, minced
2 tbsp fresh lime juice
3/4 tsp salt

Directions

Core and remove seeds from tomatoes.  Process to desired consistency, I like it a bit chunky.  Combine all ingredients, let them share their flavors for a bit, and enjoy.  Couldn't be easier.

This is just a starting point.  If you like it spicier, add more jalepeno.  If it's too tangy, use less lime juice.  Not a fan of cilantro?  Leave it out or add a different herb.  If you want more of a 'pico de gallo' texture, chop the tomatoes instead of processing them. 

Outside of this standard salsa, there are unlimied variations... usually involving fruits and/or vegetables, chili, and herbs.  Use uncooked ingredients for a light and fresh salsa or you can roast them if you want a rich, smoky flavor.  Play around!  What are your favorite renditions?

Tuesday, April 6, 2010

Product Review: Chef'n 'Stem Gem'

This is probably not something that I would have ever purchased, so I'm thankful for my mother's intuition in knowing that my kitchen needed one of these little gadgets.  I sure hope she bought one for herself!


It's super easy to use but more importantly, you can remove just the core without throwing out any of your sweet, juicy strawberry.  It's quick and effortless, I made strawberry jam over the weekend and hulled an entire kilo of strawberries in a matter of minutes thanks to this little guy. I was a machine!


And no... I'm not quitting my day job just yet to become a hand model.

Sunday, April 4, 2010

Melbourne Food and Wine Festival Review: 4th Edition

For it's second year, the Roman Block Party at Giuseppe, Arnaldo & Sons closed the Melbourne Food and Wine Festival.  Although I hear last year's was bigger and better, it was a fantastic night with gourmet nibbles, sparkling wine, and Aussie celebs circling the Crown's Roman trattoria. 

Some of Melbourne's best restaurants joined the party as Josh Emett from Maze, Anthony Lui from Flower Drum, Shinichi Maeda from Wasabi, and Neil Perry from Rockpool Bar Grill delighted our tastebuds throughout the evening.  Every hour on the hour, new and exciting cocktails were presented by Aex Marchetti of Icebergs and Danielle Gjestland of Wasabi.

We were welcomed with a glass of sparkling upon arrival and it kept flowing throughout the night.  Gourmet tasting stations were positioned throughout the restaurant - freshly shucked oyters, bluefin tuna sashimi, cured meats shaved on the spot, and my favorite, the 'roadside' suckling pig where they were serving up pulled pork ciabattas smeared with herbed pesto, crackling, and candied mustard.  Making your way over to the tuna station, you were given a choice of a more traditional sashimi with freshly grated horseradish or a spoonful of ginger and sesame marinated tuna.  The oysters didn't last and were being slurped down as fast as they were shucked. 

In addition, servers kept your mouth full as they passed around a wide variety of hors d'oeuvres showing off talents of the culinary experts in the kitchen.  There was certainly no shortage of food or drink.  I don't think empty glasses were allowed.  I was looking forward to seconds of the cheesy arancini balls, the light and fluffy crab and spring onion pancakes, and the juicy pork dumplings.

If you needed a break from the posh scene inside, you could head outside to grab a seat on the patio overlooking the Yarra.  As the night went out on, the party headed outdoors as well.  After being a big fan of last year's Masterchef Australia, I was excited to meet two of my favorite judges, Matt Preston and George Calombaris. 

The night concluded with a take-away lamington from the new kid on the block, Maze.  I will definitely be back next year and highly recommend this event as long as you don't have a big day at work Monday ;)

Friday, April 2, 2010

Pavlova Stack

As I was about to make dinner, my fiance had to go out and run a few errands.  I decided to surprise him with an after-dinner treat to quench his ever-growing sweet tooth.  I knew I didnt have much time so I needed to make something that I was comfortable with. 

As it's a favorite around here, I am obviously very comfortable with making pavlova at this point; however, it has a very long bake time...  I wasn't going to let that stop me!  Using my go-to recipe for Pavlova, I decided to make mini bases in order to decrease the required cook time to about 40 minutes.  They were too cute!

I simply layered the pavlova patties with whipped cream and topped off my pavlova mountain with passionfruit and strawberries. 


It was divine as always!  So light and delicious!  How was there life before pavlova?  The sweet strawberries and smooth cream contrasted by the tangy passionfruit and finished off with the satisfying crunch of the meringue... heaven!

It's so easy to come up with your adaption!  I think I'll experiment with adding some different flavors to the meringue!  Any available taste testers?